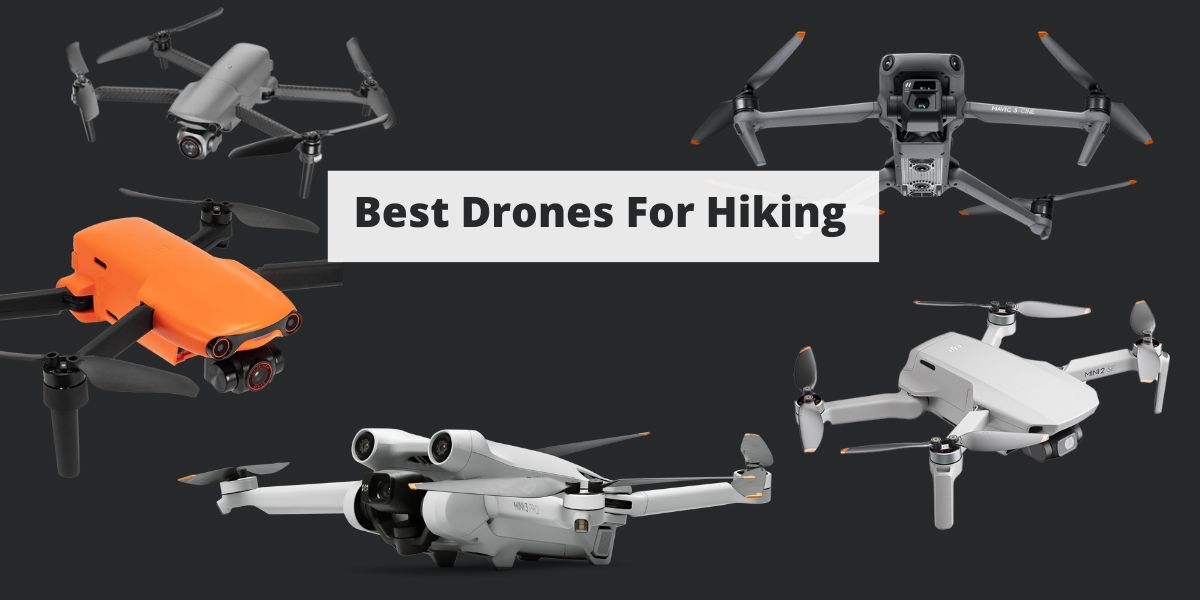
Best Hiking Drone 2025: Top Lightweight Drones for Trails and Adventures
You’re halfway up the trail, the view opens up, and you realize your phone camera just can’t capture it. The problem? Most drones are heavy, noisy, and impractical for the backcountry. No hiker wants to haul a flying brick that drains its battery before reaching the summit.
That frustration is real. Carrying the wrong drone means missing out on epic footage—or worse, leaving it at home because it’s too much hassle.
The solution? A compact hiking drone that balances image quality, battery life, and portability. The right drone for hiking fits in your pack, launches quickly, and delivers stable footage even in mountain winds. For hikers, it’s essential to choose a drone that fits easily into a backpacking pack, so you can minimize bulk and weight on the trail. Over the years, a few models have emerged as standouts for hikers who want cinematic shots without adding extra kilos.
In this guide, we’ll walk through the best hiking drone options worth considering. Whether you want top-tier performance, a budget-friendly choice, or the lightest drone possible, you’ll find one that matches your trail style.
This site contains affiliate links to products. We may receive a commission for purchases made through these links at no extra cost to you. Our recommendations are based on thorough research and real-world testing to provide you with the best options. We appreciate your support, which helps us continue to offer valuable content.
Also Read: Hiking Essentials for Beginners
Quick Summary
If you’re short on time, here’s a quick overview of the best hiking drones. Each pick is designed for a different type of hiker, so you can find the one that fits your needs best.
- DJI Mini 4 Pro – Best Overall
Ultra-light (under 249g), shoots 4K HDR, and includes advanced obstacle avoidance. Perfect for hikers who want the best balance of portability and performance. - DJI Mini 3 Pro – Best Value for Money
Strong battery life, vertical shooting for social media, and stable flight even in mountain winds. Great for hikers who want premium features without paying top-tier prices. - DJI Mini 2 SE – Best for Beginners
Affordable, easy to fly, and reliable. Ideal for first-time drone pilots who want to capture hikes without worrying about steep learning curves. It’s also a cheaper option for those who want to try drone hiking without a big investment. - Autel EVO Nano+ – Best for Image Quality
Equipped with a larger sensor for vivid colors and sharp images. Excellent choice if photography and video quality are your top priorities. - DJI Air 3 – Best for Advanced Flyers
Heavier but powerful, with dual cameras (wide + telephoto) and long-range transmission. Best for experienced hikers who don’t mind carrying a bit more weight to unlock advanced features.
Also Read: Best Hiking Poles
The Best Hiking Drone Reviews
| Drone | Weight | Flight Time | Camera | Best For | Price Range |
|---|---|---|---|---|---|
| DJI Mini 4 Pro | 249g | 34–45 min | 4K HDR @ 60fps, 12MP photos | Overall best balance of features & safety | ~$950 |
| DJI Mini 3 Pro | 249g | 34–47 min | 4K @ 60fps, 12MP photos | Best value for money, social media creators | ~$750 |
| DJI Mini 2 SE | 249g | ~31 min | 2.7K video, 12MP photos | Beginners & budget-conscious hikers | ~$340 |
| Autel EVO Nano+ | 249g | ~28 min | 4K HDR video, 50MP photos | Best image quality & low-light hiking shots | ~$800 |
| DJI Air 3 | 720g | ~46 min | Dual cameras (wide + telephoto), 4K @ 60fps | Advanced users needing pro features; bigger drones like the Air 3 offer more stability in wind and challenging conditions | ~$1,100 |
Tip: For longer hikes or extended filming sessions, carrying three batteries is ideal to maximize your total flight time.
Also Read: Best Hiking Watches
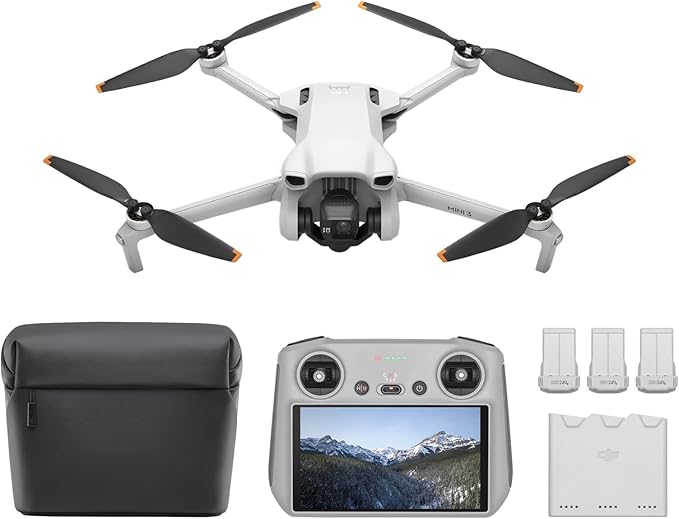
1. DJI Mini 4 Pro – Best Overall
DJI Mini 4 Pro
The DJI Mini 4 Pro is the ultimate hiking drone. It’s built for hikers who want professional-quality footage without carrying bulky gear. Compared to older Mini models, it brings a leap forward in obstacle avoidance, intelligent features, and low-light performance.
Price: $950

On the trail, weight matters. At just 249g, the Mini 4 Pro won’t feel heavier than a power bank in your pack. Its biggest strength is versatility: hikers can shoot cinematic 4K HDR video and rely on obstacle sensors to avoid tree branches or cliff edges. Smart flight modes and autonomous flight modes help avoid crashing and make it easier for users to capture smooth, cinematic footage with minimal manual control. Real-world use shows the 34-minute flight time is enough for 3–4 launches per hike, perfect for capturing summit views, ridge walks, and camp setups.

Against competitors like the Autel EVO Nano+, the Mini 4 Pro wins on flight features and ecosystem support (DJI Fly app, DJI app, DJI RC, accessories, spare batteries widely available). It’s a premium choice, but for hikers who want both safety and quality, it’s hard to beat.
Reasons to Buy
Reasons to Avoid
Best for hikers who want the top balance of portability, video quality, and safety features. See it on Amazon ->
2. DJI Mini 3 Pro – Best Value for Money
DJI Mini 3 Pro
The DJI Mini 3 Pro is the best choice if you want strong performance at a friendlier price than the Mini 4 Pro. It’s aimed at hikers who care about portability and creative shots, especially for sharing on Instagram or TikTok. Its compactness rivals the Mavic Air, making it easy to pack for any adventure.
Price: $700
The vertical shooting mode is a huge plus for content creators. Hiking at places like the Dolomites or Iceland, you can capture perfect portrait shots without cropping. The Mini 3 Pro still packs excellent battery life — over 40 minutes with the extended battery, which means fewer swaps mid-hike. Compared to the Mini 4 Pro, you lose some obstacle sensors and low-light improvements, but for most hikers, these won’t be dealbreakers.

Cinematic mode enables smooth, cinematic shots that look professional, perfect for travel vlogs or social media. It’s also significantly cheaper, making it the best value pick. If you’re upgrading from an older Mini 2, or looking for your first drone with advanced features, this is the sweet spot.
Also Read: Best Hiking Rain Jackets
Reasons to Buy
Reasons to Avoid
Best for hikers who want near-flagship performance at a lower price point and a great drone for value and performance. See it on Amazon ->
3. DJI Mini 2 SE – Best for Beginners
DJI Mini 2 SE
The DJI Mini 2 SE is an excellent new drone for first-time users entering the hobby. It’s affordable, simple to operate, and reliable in the field. Hikers who want to dip into drone photography without spending big will love it.
Price: $335

Despite being the budget option, the Mini 2 SE still flies smoothly and captures good-quality footage. As one of the best small drones for hiking, its lightweight design makes it easy to carry on the trail. On a mountain trail, the 2.7K video looks sharp enough for YouTube or personal travel films. Its GPS return-to-home feature adds peace of mind — if you lose signal or battery gets low, it automatically returns.
The included RC remote simplifies control for new users, making the flying experience more intuitive. Compared to the Mini 3 Pro and Mini 4 Pro, you lose 4K resolution and obstacle sensors, so it requires more manual piloting skill. But at half the price, it’s the ideal entry point.
Also Read: Best Hiking Gloves
Reasons to Buy
Reasons to Avoid
Best for first-time drone users looking for a budget-friendly, easy-to-fly new drone.
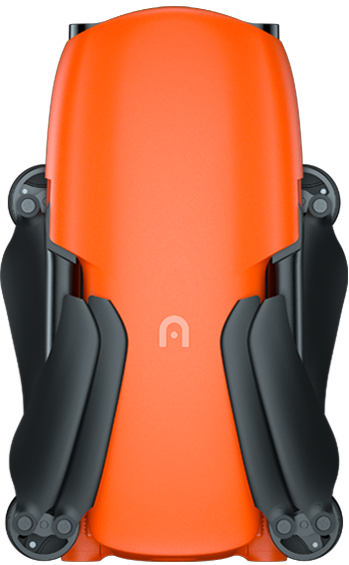
4. Autel EVO Nano+ – Best for Image Quality
Autel EVO Nano+
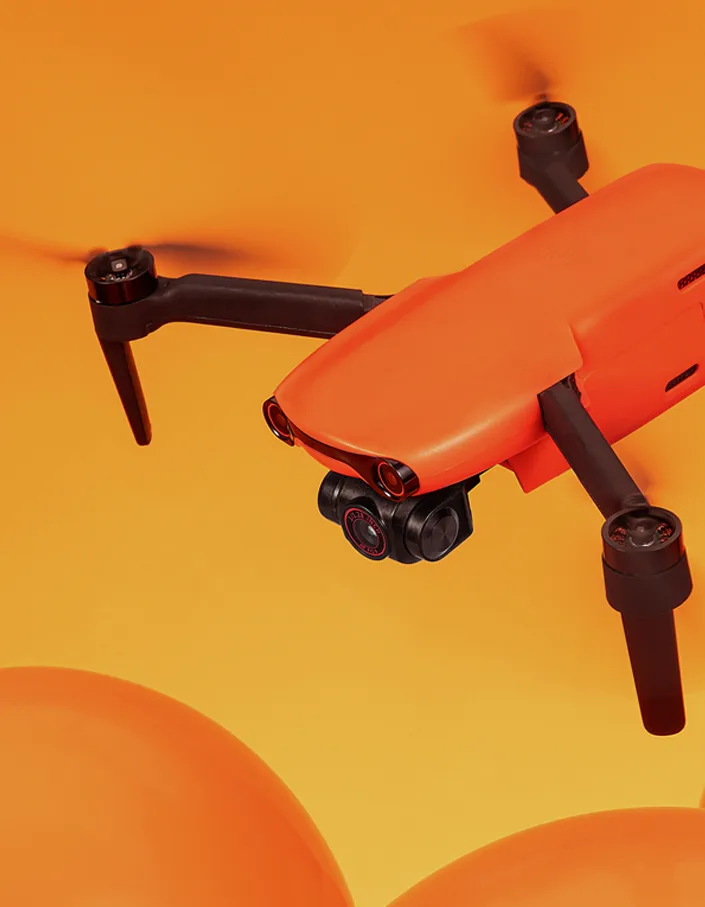
The Autel EVO Nano+ stands out for hikers who put photography and travel photography first. Its large sensor and color system deliver richer images than most drones this size, making it ideal for capturing unique perspectives while traveling or hiking. If capturing sunsets, forest details, or alpine glow is your priority, this drone is for you.
Price: $800
The RYYB color filter on the Nano+ lets in more light, which means better performance at dawn, dusk, or under cloudy skies. On hikes where golden-hour shots are everything, this drone shines. The 50MP stills also provide room to crop and edit without losing detail. The Nano+ produces high quality footage with impressive clarity and color accuracy, even in challenging lighting conditions, making it a top choice for travel photography enthusiasts.
Against DJI’s Mini drones, it falls slightly short on flight stability and app smoothness. However, for serious hikers who are photographers at heart, the Nano+ offers a creative edge that DJI doesn’t, thanks to one of the best cameras available in this category.
Also Read: Best Hiking Boots
Reasons to Buy
Reasons to Avoid
Best for hikers who prioritize photography, travel photography, and low-light performance.
5. DJI Air 3 – Best for Advanced Flyers
DJI Air 3
The DJI Air 3 is for hikers who don’t mind carrying extra weight in exchange for professional-grade shots. It’s best suited for advanced drone pilots who want more creative control and longer-range flights. Compared to the DJI Air 2S, the Air 3 offers improved flight time, enhanced obstacle avoidance, and a dual camera system, making it a more versatile choice for demanding outdoor conditions.
Price: $1000
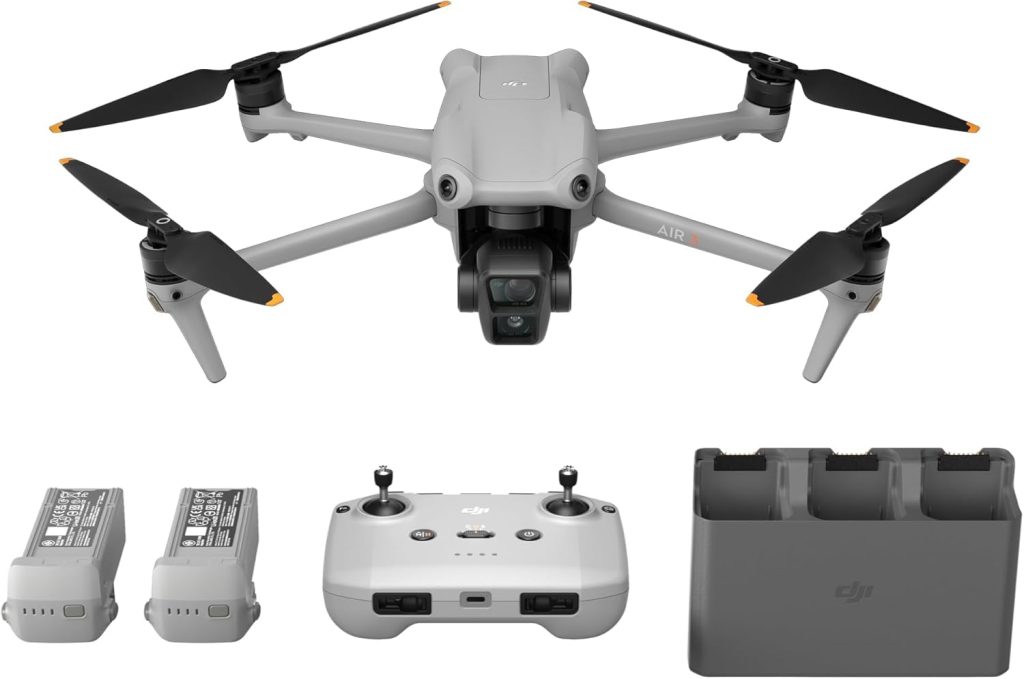
The Air 3’s dual cameras are its biggest strength. On a ridge hike, you can capture sweeping wide landscapes, then switch to the telephoto lens for close-up shots of distant peaks. The 46-minute flight time means fewer battery swaps on long trails, but it’s still wise to pack extra drone batteries to take full advantage of its endurance.
Also Read: Best Hiking Backpacks

While it’s heavier and slightly larger than the Mini series, it handles wind better and offers a more stable flight in tough alpine conditions. For comparison, the Air 3 is a step up in power and control over the DJI Air 2S, with longer flight time and improved obstacle sensing. However, unless you’re serious about drone filmmaking, the Mini 4 Pro is easier to carry and more affordable than these expensive models.
Reasons to Buy
Reasons to Avoid
Best for experienced hikers and drone users who want advanced shooting options and stability in tough conditions. See it on Amazon ->
Buying Guide
Choosing the right hiking drone isn’t just about specs. It’s about finding the best drones that match your hiking style, the trails you take, and the kind of footage you want to bring home. For those looking for travel drones, consider key features like portability, battery life, and camera quality to ensure your drone is suitable for travel and outdoor adventures.
DJI drones, especially models like the DJI Mavic Pro, are popular among hikers for their reliability and high-quality aerial footage. If you’re picking your first drone, look for easy setup, stable flight, and user-friendly controls. When testing these drones, we flew them in real hiking conditions to see how they performed on the trail. Here’s how to make the best decision.
Also Read: Best Hiking Headlamps
How to Choose a Hiking Drone: Step by Step

- Set Your Budget
- Under $400: Beginner-friendly drones like the DJI Mini 2 SE and the Mavic Mini are simple, reliable, and great for casual hikers looking for an affordable, lightweight option.
- $600–$900: Mid-range options like the DJI Mini 3 Pro or Autel EVO Nano+ offer excellent performance without breaking the bank.
- $1,000+: Premium drones like the DJI Mini 4 Pro or DJI Air 3 give you pro-level footage and advanced safety features.
- Decide How Much Weight You’re Willing to Carry
- Ultra-light (under 250g): Fits in any backpack, avoids drone registration in many countries. The Mavic Mini is a classic example of an ultra-light drone, perfect for long-distance hikers who want maximum portability.
- Mid-weight (700g+): Heavier but more stable in wind and better cameras. Suitable if you’re okay carrying extra gear.
- Think About Your Footage Goals
- For casual videos or memories: 2.7K video (Mini 2 SE) is enough.
- For YouTube or cinematic projects: 4K video and HDR (Mini 3 Pro, Mini 4 Pro, Autel EVO Nano+). Camera quality is a big deal if you want professional-looking results.
- For professional filmmaking: Dual-camera setups (DJI Air 3) unlock creative flexibility.
- Check Flight Time Against Your Hiking Style
- Day hikers: 28–34 minutes per battery is fine if you carry one or two spares.
- Multi-day trekkers: Look for 40–45 minutes (Mini 3 Pro with Plus battery, Mini 4 Pro, Air 3). Longer flight time = fewer batteries to pack.
- Evaluate Safety Features
- Beginners: Return-to-home is a must. Obstacle sensors are a big deal for avoiding accidents, especially with small drones that are popular among casual users.
- Experienced pilots: Wider sensor coverage and advanced flight modes make it easier to get complex shots in tricky terrain. For small drones, the addition of obstacle avoidance is becoming a big deal for safety and peace of mind, especially when flying outdoors during hiking trips.
Also Read: Best Hiking Tents
Key Features to Consider
- Weight: Impacts portability and whether registration is required. Under 250g drones are easier to hike with.
- Camera Quality: Ranges from 2.7K to 4K HDR and beyond. Higher resolution means more editing flexibility.
- Flight Time: Determines how much filming you can do on one battery. Always plan for spares on long hikes.
- Obstacle Avoidance: Adds safety when flying near cliffs, trees, or tight mountain paths.
- Wind Resistance: Critical for alpine hiking where conditions can shift quickly.
- Intelligent Features: Look for intelligent features such as automated shooting modes (like timelapse and vertical shooting) and advanced navigation, which enhance versatility and ease of use, especially in newer models.
- App & Ecosystem: DJI’s Fly app is user-friendly and widely supported; Autel offers independence from DJI but has a steeper learning curve.
Features Head to Head
DJI Mini Series vs DJI Air 3
- Mini Series: Ultra-portable, registration-free, easy for beginners, but less stable in high winds compared to bigger drones. More affordable than expensive models, making it a great entry point for casual users.
- Air 3: Heavier, more stable—especially in strong winds thanks to its status as a bigger drone—dual cameras for professionals, but requires more pack space, drone registration, and comes at a higher price similar to other expensive models with advanced features.
Obstacle Avoidance vs No Obstacle Avoidance
- With Sensors (Mini 3 Pro, Mini 4 Pro, Air 3, Autel EVO Nano+): Safer for flying near cliffs, forests, or while hiking solo. Great for peace of mind.
- Without Sensors (Mini 2 SE): Cheaper and lighter, but requires careful piloting. Best for open landscapes and beginners who fly cautiously.
👉 In short: ask yourself three questions — How much weight am I willing to carry? What kind of footage do I want? What’s my budget? The answers will point you to the best drone for your hikes.
Best Hiking Drone for Different Conditions
Each hiking situation has its own challenges. Below are scenarios you might face, with recommendations for which drone from the top picks suits best — plus tips to get the most out of them.
| Condition | Best Drone from Picks | Why It Excels | Extra Tips |
|---|---|---|---|
| Ultralight / Fast Moving Hikes (long distances, minimal gear) | DJI Mini 2 SE or DJI Mini 3 Pro | Both are under 250 g, very compact. Mini 2 SE is simplest; Mini 3 Pro adds more capability (4K video, more creative modes) without much added weight. | Bring spare batteries rather than a bigger drone. Keep flights short so you can hike and fly without fatigue. Use lightweight strap or case. For longer sessions, consider bringing three batteries to maximize flight time. |
| Cold Weather / Winter / Snow | Autel EVO Nano+ or DJI Mini 4 Pro | Cold impacts battery life and electronics. Drones with strong sensors and good build perform better. These two offer better low-light performance (helpful when winter light is poor) and more robust features. | Check manufacturer’s recommended operating temperature. Warm batteries before flight. Carry hand-warmers. Always keep moisture out of motors; use a take-off pad when launching from snow. |
| Windy / Coastal Trails | DJI Air 3 or DJI Mini 4 Pro | Weigh more, stronger motors, better stability and control. Air 3 especially holds up better in gusts, and better obstacle sensors help avoid hazards. | Fly lower where winds are less. Plan routes with wind direction in mind. Use slower, smoother movements for filming. |
| Multi-Day Trekking / Backpacking | DJI Mini 3 Pro (Plus Battery) or DJI Air 3 | More flight time means fewer batteries to carry. Accessories and spare batteries become part of your kit. The larger drones give you more flexibility but you pay in weight. Lightweight drone batteries are especially important for backpacking, as they reduce your overall pack weight and make it easier to carry all your gear over long distances. | Prioritize batteries over extras like filters. Know how many flights you can do per battery. Keep drone and batteries in insulated packs at cold nights so you can fly early mornings. For multi-day trips, bringing three batteries ensures you have enough power for extended outings. |
| Photography / Low-Light / Dawn & Dusk Shots | Autel EVO Nano+ or DJI Mini 4 Pro | Larger sensors or color-sensitive sensors (e.g. RYYB in Nano+) help capture more detail and less noise in low light. Better lens options or exposure control also matter. These recommended drones feature some of the best cameras for hiking, delivering high-quality images even in challenging lighting conditions. | Use RAW photo mode if available. Shoot with a slower shutter but stabilise drone well. Plan for golden hour when light is softer. Protect your camera and accessories with a camera bag to keep your gear safe and organized during your hike. |
| Budget-Constrained / First-Time Buyers | DJI Mini 2 SE | Most affordable in the list. Easy to use, reliable, lighter regulations in many areas (if under weight limits). Good entry point. | Start with basic accessories. Don’t push limits (wind, speed) until you know your drone’s behaviour. Consider second-hand or refurbished but check condition (batteries, gimbal). |
Key Considerations by Scenario
- Battery and Temperature: Cold weather reduces battery efficiency, especially for drone batteries. Always assume you’ll get 20–30% less flight time when it’s cold, and keep drone batteries warm before use.
- Regulations & Weight: In many places, drones under ~250g face fewer registration and licensing requirements. The US government requires registration for drones over 250g, so staying under that threshold helps if you plan to fly often or travel internationally.
- Portability vs Stability Trade-off: Lighter drones = easier to carry, but more vulnerable to wind. Heavier drones = more stable, but added burden. Decide what you’ll encounter more: steep hikes with wind, or flat trails in calm conditions.
- Sensor Coverage & Safety: In tricky terrain (forests, cliffs, snow), obstacle avoidance and strong return-to-home features make a difference. It can be the difference between losing a drone or saving it.
What to Do Next
- Match your typical hike conditions (distance, weather, terrain) to one of the scenarios above.
- Pick the drone that performs best in most of your conditions rather than one ideal scenario.
- Plan your purchase (budget + accessories + legal steps) so when you get the drone, you’re ready to fly safely and effectively.
User Scenarios / Use Cases
Not every hiker has the same needs. Here are some common scenarios and the best hiking drone for each:

Weekend Backpacker
- Profile: Goes on overnight or weekend hikes with light gear. Wants memories, not pro-level footage. Travel drones are ideal for these users due to their portability and ease of use.
- Best Pick: DJI Mini 2 SE → lightweight, affordable, and reliable enough for quick trips.
Content Creator / Social Media Hiker
- Profile: Loves sharing clips on Instagram, TikTok, or YouTube. Needs vertical shooting and easy editing options. Travel drones are perfect for content creators who need compact gear for on-the-go shooting.
- Best Pick: DJI Mini 3 Pro → vertical shooting mode + long battery life, perfect for trail reels and stories.
Alpine Trekker
- Profile: Tackles windy ridges, mountain passes, and longer treks. Needs stability and safety features in tough conditions.
- Best Pick: DJI Mini 4 Pro → best balance of portability, wind resistance, and obstacle avoidance.
Photography-Focused Hiker
- Profile: Prioritizes sunrise, sunset, and low-light shots. Wants crisp detail and vivid color over convenience.
- Best Pick: Autel EVO Nano+ → bigger sensor and stronger low-light performance.
Pro Filmmaker / Advanced User
- Profile: Experienced pilot, willing to carry extra weight for cinematic flexibility. The DJI Mavic Pro remains a classic option for advanced users who value proven performance and portability.
- Best Pick: DJI Air 3 → dual cameras, long flight time, stable in wind, ideal for pro-level content.
👉 The takeaway: match your hiking style to your drone. If you hike light and casual, a Mini 2 SE is enough. If you’re serious about filmmaking, step up to the Air 3 or consider the DJI Mavic Pro as a classic choice. For everyone else, the Mini 3 Pro or Mini 4 Pro are among the best drones for hiking and travel, offering a great balance of features for most users.
Accessories to Consider
Adding the right accessories boosts what you get from your drone. Here are must-haves and helpful extras — followed by some actual product suggestions.
Carrying Case/Protective Backpack Insert:
A sturdy carrying case or protective insert is essential for keeping your drone safe during travel. For those who hike or travel, a good backpacking pack should have space to fit your drone and accessories without adding too much weight or bulk.
Weather Protection Gear or MicroSD Cards:
Weather protection gear helps shield your drone from the elements. Additionally, using a camera bag is a smart way to organize and protect your camera gear, including your drone, cameras, and accessories, especially when on the move.
Spare Batteries & Power Management:
Always bring spare batteries for your drone. Lightweight drone batteries are especially important for hiking and backpacking, as they make it easier to carry enough power without weighing down your pack.
Must-Have Accessories
- Spare Batteries & Power Management
- Why: Extends flight time. Hiking drains batteries faster in cold, thin air, or when flying hard.
- What to look for: Official or high-quality batteries compatible with your drone. Carry rugged, insulated battery cases or pouches.
- ND / CPL Filters
- Why: Help you maintain proper exposure in bright light, prevent washed-out skies, reduce glare. Important for video to get motion blur that looks natural, and for photography in harsh light.
- What to look for: Lightweight, high-transmission optical glass, good build (frames), matching filter sizes or snap-on design for your drone model (Mini series, Air 3, etc.).
- Landing Pad / Launch Pad
- Why: Protects gimbal, camera, motors from dust, loose rocks, mud, snow. Makes takeoffs/landings safer and cleaner. Also helps with visibility of launch zone (especially for return-home).
- What to look for: Foldable, waterproof, lightweight, good size (balance between large enough for safety and compact for packing). High-visibility colours are a plus.
- Carrying Case / Protective Backpack Insert
- Why: Keeps drone, props, accessories safe during transport; absorbs shocks; prevents damage from other gear.
- What to look for: Padded compartments, rigid or semi-rigid protection, ideally waterproof or water-resistant, good organizational pockets for batteries, cables, filters.
- Propeller Guards (if needed)
- Why: In tight terrain (trees, bushes), helps avoid broken props. Also safer around people or wildlife.
- What to look for: Lightweight guards that don’t add too much drag or weight; easy to attach/remove.
- MicroSD Cards / Transfer Tools
- Why: High-resolution video needs fast, large-capacity cards. Also, being able to offload or back up data if you’re out multi-day is crucial.
- What to look for: UHS-I / UHS-II cards with high write speed, durable case; a USB-C or card reader; maybe a portable SSD or power bank.
- Weather Protection Gear
- Why: Rain, snow, dew, cold all harm electronics.
- What to look for: Waterproof bag/case; lens cloth; silica gel; protection for controller and batteries; perhaps an umbrella or cover for launches.
Recommended Products
Here are highlights:
- DJI Mini 4 Pro Filters All‑Day 6‑Pack: A set of six ND / ND-PL filters for the Mini 4 Pro. Great to adjust for different light conditions (bright sun, glare off snow, etc.). Light, compact, fits in your drone bag.
- PGYTECH Landing Pad Pro (Medium): Waterproof pad, medium size, solid quality. Useful in environments like grassy slopes, sandy trails, or muddy launch spots.
- Hoodman Weighted Tri‑fold Launch Pad: Orange, highly visible, folds down compactly. Weighted edges so it stays put in mild wind. Helps keep drone safe on rough surfaces.
- CamGo 75 cm Reflective Landing Pad: Large diameter, reflective strips for visibility, dual-colour faces so you can switch depending on surroundings. Good for evening flights or mixed terrain.
- STARTRC Universal Waterproof 55 cm Pad: Mid-size, fits most mini drones, waterproof fabric, comes with a carrying pouch. Solid mid-budget option.
- LKTOP 65 cm Foldable Universal Pad: Larger pad, folds down small, decent build. Useful if you want more margin in landing zones.
- Fast‑Fold Leather 55 cm Landing Pad: More premium materials (PU leather), fast-folding mechanism, stylish but still functional. Good if you care about durability and aesthetics.
- Double‑sided Landing Mat Outdoor: Lightweight, reversible colour sides (good to adapt to terrain colour), modest size; very affordable.
How to Choose the Right Accessories for You
- If you hike light and fast, choose a backpacking pack that can fit your drone and essential accessories. Focus first on filters and one landing pad. Skip heavy cases; maybe use minimalist storage.
- If you often fly in dusty, sandy, or wet terrain (beaches, snow, forests), invest more in pads, waterproof protection, and protective cases.
- If you shoot a lot of video in bright light or with fast motion, filters are essential — to avoid overexposed sky or motion that looks choppy.
- If you hike multi-day and remote, carrying backups (batteries, props), power bank, spare sd cards, and durable gear will save you from getting stuck.
Common Mistakes to Avoid When Hiking with a Drone
Even the best drone won’t save you from poor habits. Here are the mistakes many hikers make — and how you can avoid them.
- Ignoring Local Drone Laws – Flying in restricted areas (like national parks or protected zones) can lead to fines or confiscation. Always check regulations before your hike.
- Underestimating Wind – Lightweight drones struggle in alpine gusts. Launching in strong wind can drain batteries quickly or cause a crash. If conditions feel too strong for a safe flight, wait it out.
- Forgetting to Update Firmware – Outdated firmware may limit performance or even prevent take-off. Update your drone and controller before heading out — not on the trail where you may lack signal.
- Draining Batteries Before Storage – Lithium batteries degrade if fully drained or stored at 100% charge. Keep them at 40–60% when not in use, especially after a trip.
- Flying Without Spare Batteries – Hiking is unpredictable. If you only carry one battery, you’ll miss shots when it runs out. Always bring 2–3 spares for day hikes.
- Packing Without Protection – Tossing your drone loose in a pack risks gimbal damage or cracked propellers. Use a padded case or gimbal cover every time.
- Flying Too Far or Out of Sight – Hiking trails often have trees, cliffs, or sudden elevation changes that block signal. Always keep your drone in line of sight to avoid losing it. Many people have flown their drone beyond visual range and then lost connection or crashed into obstacles.
- Flying Without Obstacle Avoidance – If you fly without using sensors or obstacle detection, it’s much harder to avoid crashing into trees or rocks, especially in dense forests or uneven terrain.
- Disturbing Wildlife or Other Hikers – Loud buzzing can stress animals or ruin another hiker’s experience. Fly respectfully — short, planned flights are better than hovering endlessly.
Care & Maintenance Tips for Hiking Drones
A good hiking drone is an investment. Taking care of it ensures smoother flights, safer operation, and a longer lifespan. Here’s how to keep yours in top shape:
Battery Care
- Store drone batteries at 40–60% charge when not in use.
- Keep drone batteries warm in cold weather (inside your jacket or with hand warmers).
- Avoid draining drone batteries to 0% or charging to 100% for long-term storage.
Propeller & Motor Check
- Inspect propellers before every hike. Replace them if chipped, bent, or cracked.
- Remove dust, dirt, or sand from motors after flying in rugged conditions.
Gimbal & Camera Protection
- Always use the gimbal cover when packing your drone.
- Wipe the lens with a microfiber cloth to avoid scratches or smudges.
Storage During Hikes
- Carry the drone and camera gear in a camera bag or a padded or hard-shell case inside your backpack.
- Avoid packing it next to heavy gear like stoves or water bottles.
Firmware & App Updates
- Update the drone and controller before your trip, not on the trail.
- Carry offline maps in the app in case you lose signal.
Post-Hike Cleaning
- Wipe down the drone if exposed to dust, snow, or sea spray.
- Check for loose screws or signs of wear after longer trips.
Weather Awareness
- Don’t fly in heavy rain or snow. Moisture damages motors and electronics.
- Use a landing pad on dirt, grass, or snow to keep the drone clean.
Conclusion
The right hiking drone can turn a good trail into a lasting story. Whether you’re hiking a local forest loop or tackling multi-day treks in the mountains, carrying the right drone ensures you bring home cinematic memories without extra hassle.
- If you want the best all-around option, go with the DJI Mini 4 Pro — it delivers outstanding footage, obstacle avoidance, and portability in one package.
- For hikers looking for value without compromise, the DJI Mini 3 Pro is the sweet spot with long flight time and vertical shooting for social media.
- Beginners on a budget should consider the DJI Mini 2 SE — affordable, easy to fly, and light enough for any pack.
- If image quality is your top priority, the Autel EVO Nano+ stands out with its larger sensor and excellent low-light performance.
- For experienced pilots who want pro-level shots and don’t mind extra weight, the DJI Air 3 is the most powerful choice.
No matter which one you choose, the key is matching the drone to your hiking style. Think about weight, footage goals, and budget — then pick the model that makes sense for your adventures.
👉 Ready to capture your hikes from above? Choose the drone that fits your needs, add it to your pack, and start filming your next trail in a way your phone never could.
FAQ: Best Hiking Drone
1. Do I need to register my hiking drone?
- In many countries, drones under 250g (like DJI Mini 2 SE, Mini 3 Pro, Mini 4 Pro, Autel EVO Nano+) do not require registration. However, the US government requires registration for drones over 250g. Heavier drones (like DJI Air 3) usually do. Always check local regulations before flying.
2. How many batteries should I carry on a hike?
- For day hikes, carrying three batteries is recommended for most hikes. This gives you enough flight time (60–120 minutes total) to capture multiple shots without running out of power. For multi-day treks, bring extra or plan for recharging at huts/lodges.
3. Can hiking drones handle strong winds?
- Lightweight drones (under 250g) perform well in moderate winds but struggle in strong alpine gusts. For windy conditions, the DJI Air 3 or Mini 4 Pro are more stable.
4. How do cold temperatures affect drones?
- Cold drains batteries faster. Expect 20–30% less flight time in snow or near-freezing weather. Keep batteries warm in your jacket until just before use.
5. What’s the easiest drone for beginners?
- If you’re choosing your first drone, the DJI Mini 2 SE is the best starting point. It’s affordable, easy to fly, and lightweight. The Mavic Mini is also a great lightweight option for beginners. Both include GPS return-to-home for safety.
6. Which hiking drone has the best camera quality?
- For photo quality, the Autel EVO Nano+ excels thanks to its larger sensor and strong low-light performance. For video, the DJI Mini 4 Pro provides the most balanced 4K HDR option.
7. Can I use a drone on every hiking trail?
- No. Many national parks and protected areas restrict or ban drones. Always research local drone laws and trail regulations before flying.
8. How do I pack a drone for hiking?
- Use a hard-shell or padded case inside your backpack. Keep batteries in fireproof pouches or separate compartments. Always protect the gimbal with its cover.
9. What controls or apps do I need to fly DJI drones?
- DJI drones are typically operated using the DJI RC or DJI RC-N1 controllers, which offer features like built-in screens and easy integration. The DJI app is also essential for connecting your smartphone, accessing camera controls, and using advanced features.
10. What are some classic or well-known hiking drone models?
- The DJI Mavic Pro is a well-known choice for travel and hiking, offering portability and high camera quality for capturing unique angles.
11. Which drone brand is most popular among hikers?
- DJI drones are the most popular among hikers due to their reputation for high-quality aerial photography, stability, and user-friendly features.
Benefits of Using a Drone for Hiking
Bringing a drone along on your hike opens up a whole new world of possibilities. Modern drones are packed with features that make them perfect companions for outdoor adventures. With advanced obstacle avoidance sensors, you can confidently fly through forests or along rocky ridges without worrying about crashing into branches or boulders. High camera resolution means you’ll capture every detail of sweeping vistas, winding rivers, and dramatic peaks—far beyond what your phone or action camera can achieve.
For hiking photographers, drones offer creative freedom. Intelligent flight modes like follow-me, orbit, and waypoint navigation let you record dynamic shots hands-free, so you can focus on enjoying the trail while your drone does the work. Whether you want to fly over a waterfall, circle a summit, or reveal a hidden lake, these smart features make it easy to get cinematic footage with minimal effort.
Drones also allow you to explore and document areas that are tough to reach on foot. Fly over dense forests, across canyons, or up sheer cliffs to capture perspectives that would otherwise be impossible. The result? Breathtaking aerial footage and unique memories from every hike. With the right drone, you’ll not only relive your adventures—you’ll see them from a whole new angle.
Notable Mentions: Other Popular Hiking Drones
While the DJI Mini series and Autel EVO Nano+ are top picks for most hikers, there are a few other drones worth considering if you want even more power or unique features. The Autel Robotics EVO II 8K stands out with its incredible 8K camera resolution and robust 3-axis gimbal, making it a favorite for those who demand the highest video quality and longer flight times. Its obstacle avoidance sensors add an extra layer of safety when flying in challenging terrain.
The Hubsan Zino Pro 4K is another solid option for hikers who want a compact drone with impressive camera quality. It shoots crisp 4K video and is easy to pack, making it a good alternative for those looking for a balance between performance and portability.
For those who want the ultimate in camera quality and advanced features, the DJI Mavic 3 is hard to beat. With its large sensor, exceptional video quality, and comprehensive obstacle avoidance system, it’s a powerhouse for serious drone enthusiasts. However, it’s heavier and more expensive than the DJI Mini series, so it’s best suited for hikers who don’t mind carrying a bit more weight for professional-grade results.
When choosing among these drones, consider your priorities: flight times, camera resolution, obstacle avoidance, and how much gear you’re willing to carry. Whether you go with a DJI Mini, a Mavic, or another brand, the best drone is the one that fits your hiking style and helps you capture the adventure.
Pre-Flight Checks for Hiking Drones
Before you hit the trail and launch your drone, a quick pre-flight check can make all the difference between a smooth flight and a frustrating mishap. Start by inspecting your drone’s propellers for any cracks or damage, and make sure your batteries are fully charged and securely installed. Check the camera lens for smudges or dust, and ensure your memory card has enough space for new footage.
Next, calibrate the compass and GPS to ensure accurate navigation—especially important when flying in remote areas or near cliffs. Always review the weather forecast before your hike; strong winds, rain, or sudden changes in weather can put your drone at risk. It’s also essential to know the rules: many national parks and forests have restrictions or outright bans on drone flying, so double-check local regulations before you take off.
By taking a few minutes for these pre-flight checks, you’ll reduce the risk of accidents and set yourself up for a safe, enjoyable flight every time you head out on the trail.
In-Flight Tips for Trail Adventures
Once you’re in the air, a few smart moves can help you get the most out of your hiking drone while keeping your flights safe and respectful. Use your drone’s obstacle avoidance sensors to steer clear of trees, rocks, and other trail hazards—especially when flying in dense forests or narrow canyons. Take advantage of intelligent flight modes like follow-me, orbit, or waypoints to capture smooth, cinematic footage of your hike without needing to pilot every move manually.
To get the best image quality, adjust your camera settings based on the lighting and landscape. Play with aperture and shutter speed to capture crisp, vibrant shots, whether you’re filming a sunlit ridge or a shaded valley. Always be aware of your surroundings: avoid flying over groups of other hikers, and steer clear of sensitive wildlife habitats to minimize your impact on the environment.
By combining your drone’s smart features with thoughtful flying, you’ll bring home stunning footage and keep your trail adventures safe and enjoyable for everyone.
Carrying and Storing Your Drone on the Trail
Protecting your drone while hiking is just as important as flying it. Invest in a sturdy backpack or a case designed specifically for drones—like the DJI Mini 3 Pro’s travel case—to keep your gear safe from bumps, dust, and moisture. These cases often have custom compartments for your drone, extra batteries, propellers, and other accessories, making it easy to stay organized on the go.
When you’re on the trail, store your drone in a secure, dry spot—think inside your pack, nestled between soft gear, or on a stable rock or tree trunk when you stop for a break. Avoid leaving your drone exposed to the elements or unattended, as sudden weather changes or curious wildlife can spell trouble. It’s also smart to carry extra batteries, a portable charger, and a small toolkit for quick repairs or adjustments if needed.
By taking a little extra care with how you carry and store your drone, you’ll ensure it’s always ready to fly—and you’ll capture every epic moment of your hiking adventure without worry.
![The Best Hiking Tents for Your Next Outdoor Adventure [2025]](https://www.hikingwithlee.com/wp-content/uploads/2024/11/best-hiking-tents-768x432.jpg)
![Top 5 Best Hiking Headlamps for Backpacking [2025 Guide]](https://www.hikingwithlee.com/wp-content/uploads/2024/11/best-hiking-headlamps-768x512.jpg)
![The Best Hiking Boots for Men [2025]: Comfort and Durability for Every Trail](https://www.hikingwithlee.com/wp-content/uploads/2024/11/best-hiking-boots-for-men-768x575.webp)